
How to Fix Peeling Cabinet Paint That Lasts
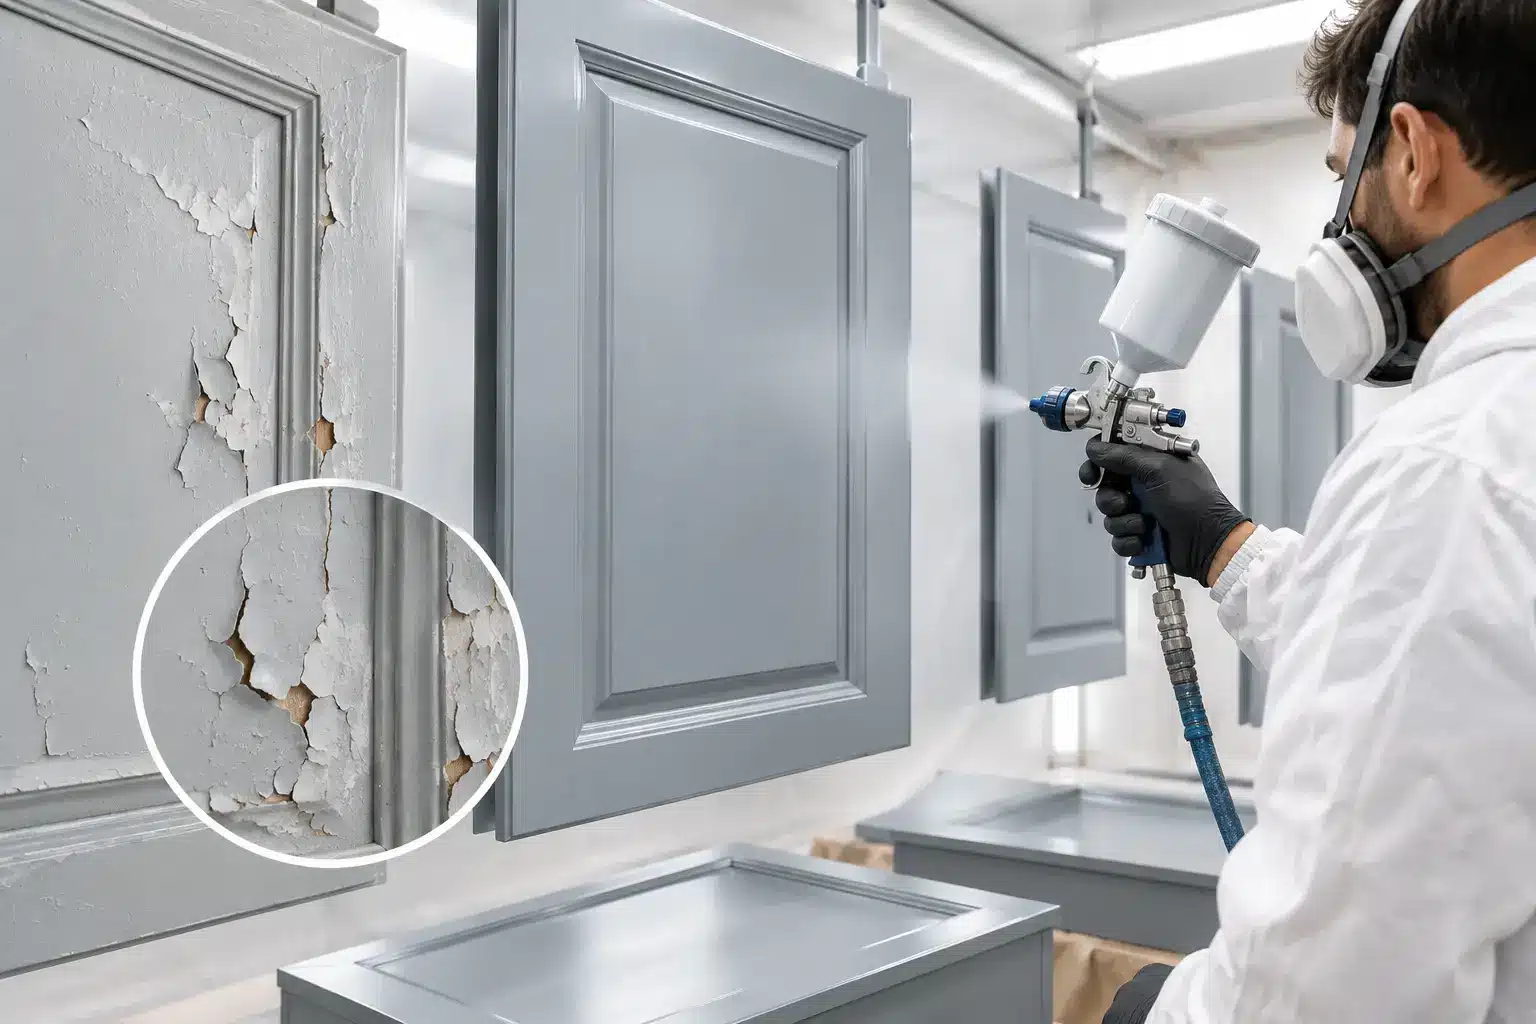
A cabinet finish rarely starts peeling because of one bad day in the kitchen. It usually reflects a breakdown underneath the paint: cooking residue that was never removed, a glossy surface that was not properly sanded, moisture exposure, or paint applied without the right bonding primer. Knowing how to fix peeling cabinet paint means correcting that underlying failure, not simply painting over the loose spots.
A careful repair can restore the clean, finished look of a kitchen or bathroom vanity. But the scope matters. A few isolated chips near handles may be a manageable touch-up. Widespread peeling across doors, drawer fronts, and frames is often a sign that the entire finish system needs to be removed or stabilized and rebuilt with professional-grade preparation.
Start by Finding Out Why the Paint Is Peeling
Before reaching for a brush, inspect where and how the failure appears. Paint lifting in small flakes around pulls, drawer edges, and cabinet doors may be caused by repeated hand contact, oils, and impact. Peeling near a sink or dishwasher can point to humidity, steam, or water exposure. If the paint releases in broad sheets, the more likely problem is poor adhesion between the paint and the cabinet surface.
Cabinets are not like a standard painted surface. They are regularly touched, cleaned, exposed to grease, and subject to temperature changes. Many have factory-applied finishes that are slick, durable, and difficult for new paint to grip without deliberate surface preparation.
Look closely at the exposed area beneath a peeled section. If you see a shiny, smooth coating, the surface may not have been sufficiently deglossed or primed. If the exposed material feels soft, swollen, or crumbly, moisture may have damaged the substrate. Paint alone cannot correct material that has lost its integrity.
Decide Whether a Spot Repair Is Enough
A localized repair can be appropriate when the surrounding paint remains firmly bonded. Press around the damaged area with a fingernail or the edge of a putty knife. If paint continues to lift beyond the visible chip, the repair area is larger than it first appears.
Spot repairs are best for limited damage from a knock, a handle change, or minor wear. If peeling appears on multiple doors or along many edges, a piecemeal approach often produces uneven texture, mismatched sheen, and more failures later. In that case, a complete refinishing process is the better investment in a consistent, factory-quality result.
How to Fix Peeling Cabinet Paint Step by Step
The repair process is less about applying a fresh coat and more about creating a stable surface that the new coating can hold. Rushing any stage can make the paint look acceptable for a short time, then fail again under daily use.
1. Remove Every Loose Edge
Take off hardware when possible so you can work cleanly around the damaged area. Use a sharp scraper or putty knife to lift away paint that is already loose. Do not stop at the most visible chip. Continue until you reach paint that is firmly attached and does not lift when gently tested.
Avoid digging aggressively into the cabinet face. The goal is to remove failed paint while preserving the profile and flatness of the door or drawer front. On routed doors, a flexible sanding sponge can help follow contours without flattening the detail.
2. Clean More Thoroughly Than You Think You Need To
Kitchen cabinets collect invisible grease and residue, especially around cooking areas and frequently touched doors. Bathroom vanities may carry soap film, cosmetics, and moisture-related buildup. Even a small amount of contamination can interfere with adhesion.
Use a cabinet-safe degreasing cleaner, working the repair area and the surrounding surface. Wipe with clean water as directed by the product instructions, then allow the cabinet to dry fully. A surface can feel dry while residue remains, so use fresh cloths rather than moving grease from one section to another.
This step is one reason professional cabinet refinishing is more involved than a quick repaint. Clean paint cannot compensate for a contaminated foundation.
3. Sand the Transition Smooth
Sand the exposed edges of the old finish until there is no sharp ridge where paint meets bare material. This is called feathering the edge, and it prevents the outline of the repair from showing through the final coat.
For most cabinet repairs, a medium-fine grit is useful for leveling, followed by a finer grit to smooth the transition. Sand enough to dull the remaining surrounding finish as well. The new primer needs a clean, lightly abraded surface to grip.
Vacuum away dust, then wipe the surface with a clean, lint-free cloth. Fine sanding dust is easy to overlook, yet it can leave texture and reduce adhesion under the primer.
4. Repair Dings Only After the Surface Is Stable
If the cabinet has shallow dents or gouges, apply a high-quality wood filler after removing all unstable paint. Let it dry completely, then sand it flush with the surrounding surface. Deep holes, swollen corners, and cracked seams may require a more extensive repair before refinishing can begin.
Do not use filler to disguise active peeling. Filler needs a stable base just as paint does. If the finish below it is failing, the repair will eventually release with it.
5. Use the Right Bonding Primer
Primer is the bridge between the prepared cabinet surface and the finish coat. For slick factory finishes, stained wood, laminate, or previously painted cabinetry, use a high-adhesion bonding primer suited to that material. Generic wall primer is not an equivalent substitute.
Apply a thin, even coat rather than trying to cover everything heavily at once. A thick primer coat can create visible brush marks, soft edges, and unnecessary texture. Once dry, inspect the surface under strong side lighting. If the repair line is still visible or the surface feels rough, sand lightly, remove the dust, and prime again as needed.
6. Apply a Cabinet-Grade Finish in Thin Coats
A durable cabinet coating is formulated to tolerate more handling and cleaning than typical interior paint. Apply it in thin, controlled coats and follow the required dry time between coats. Thick coats are tempting because they appear to cover quickly, but they are more likely to sag, texture, or remain soft beneath the surface.
For a small repair, a careful brush-and-roll method may be acceptable if the existing finish has a forgiving texture. On smooth, visible cabinet doors, blending a hand-applied repair into a sprayed finish can be difficult. Controlled spraying is what creates the smooth, even factory-finish appearance homeowners expect across an entire cabinet set.
7. Let the Finish Cure Before Normal Use
Dry to the touch is not the same as cured. Cabinet coatings need time to harden enough to resist fingerprints, cleaning products, cookware contact, and repeated opening and closing. Follow the coating manufacturer’s cure guidance, which may extend well beyond the time it takes for the surface to feel dry.
During curing, avoid reinstalling hardware too tightly, cleaning aggressively, or allowing doors and drawer fronts to rub together. Giving the coating this protected time is one of the simplest ways to preserve the repair.
Common Shortcuts That Cause Peeling to Return
The most common mistake is painting directly over peeling areas. New paint may temporarily hold the loose paint down, but it has not bonded to the cabinet itself. When the original layer releases, the new layer comes with it.
Skipping degreasing is another frequent issue. Sanding can roughen a greasy surface, but it does not reliably remove contaminants trapped in the texture. Using the wrong primer, applying overly heavy coats, and handling cabinets before the coating cures can also shorten the life of the finish.
Humidity deserves attention as well. A cabinet near a steamy dishwasher or bathroom shower needs sound ventilation and a fully cured, moisture-resistant coating. If water is repeatedly getting into seams or damaged edges, solve that exposure before refinishing the area.
When It Makes Sense to Call a Cabinet Refinishing Specialist
A professional assessment is worthwhile when peeling is widespread, when doors have a smooth sprayed finish that needs to match precisely, or when the cabinet material shows water damage. It is also the practical choice when you want a full color transformation without the uneven appearance that often comes from repairing one section at a time.
A specialized cabinet process includes meticulous cleaning and degreasing, sanding, bonding primer, and controlled-environment spraying of doors and drawer fronts. Those steps are designed to deliver a finish that feels intentional, smooth, and durable rather than merely covered.
For Charlotte-area homeowners with structurally sound cabinetry but failing paint, Simpli Painted approaches finish restoration as a detailed surface system, not a quick cosmetic fix. The best repair is the one that removes the reason the finish failed in the first place, then gives the cabinetry the careful preparation and curing time a lasting result requires.

